PHP’s maximum execution time determines how long a script is allowed to run before it times out, commonly set to 30 seconds by default. This limit can cause issues for tasks that require longer processing, like sending bulk emails or performing large file imports and exports. Fortunately, in cPanel, you can adjust this setting as needed.
Steps to Increase PHP Maximum Execution Time in cPanel
-
Log into Your cPanel Account:
- Access cPanel by entering your username and password, or via your hosting provider’s client area.
-
Navigate to PHP Selector:
- In the Software section, look for Select PHP Version and click on it.
-
Open the Options Tab:
- Once inside the PHP Selector, go to the Options section to access the
php.inisettings.
- Once inside the PHP Selector, go to the Options section to access the
-
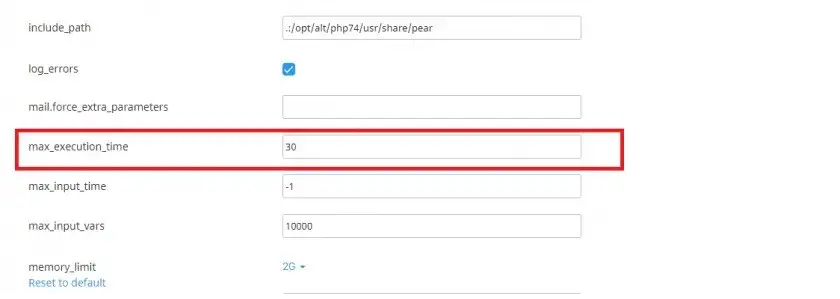
Adjust max_execution_time:
- Find max_execution_time and change its value. The default is typically 30 seconds, but you can set it higher, like 120 seconds (2 minutes) or 180 seconds (3 minutes), based on your needs.
- Note: Setting the value to 0 makes it unlimited (use this cautiously).
-
Save Your Changes:
- Click anywhere outside the input box to confirm the change. A green confirmation box should appear if the change was applied successfully.
Verifying Execution Time
Use PHP’s phpinfo() function to check the current value of max_execution_time:
phpinfo();
Measuring Script Execution Time
To calculate a script's execution time, use the microtime() function at the start and end of the script:
This method is useful for optimizing scripts and understanding their impact on server performance. Adjusting max_execution_time in cPanel is straightforward and ensures that resource-intensive scripts run smoothly without unnecessary timeouts.
