How to create a full cPanel backup
Creating a full cPanel backup is essential before making significant changes to your website, such as data modifications or migrations. A full backup includes all account files, databases, email accounts, and settings. Here’s how to do it:
Step 1: Access cPanel
- Login to cPanel: Use your cPanel credentials to log in to your account.

Step 2: Navigate to the Backup Section
- Files Section: Locate the Files section in the cPanel dashboard.
- Backup Menu: Click on the Backup icon.
Step 3: Start the Backup Process
- Download a Full Account Backup: Click on the Download a Full Account Backup option.

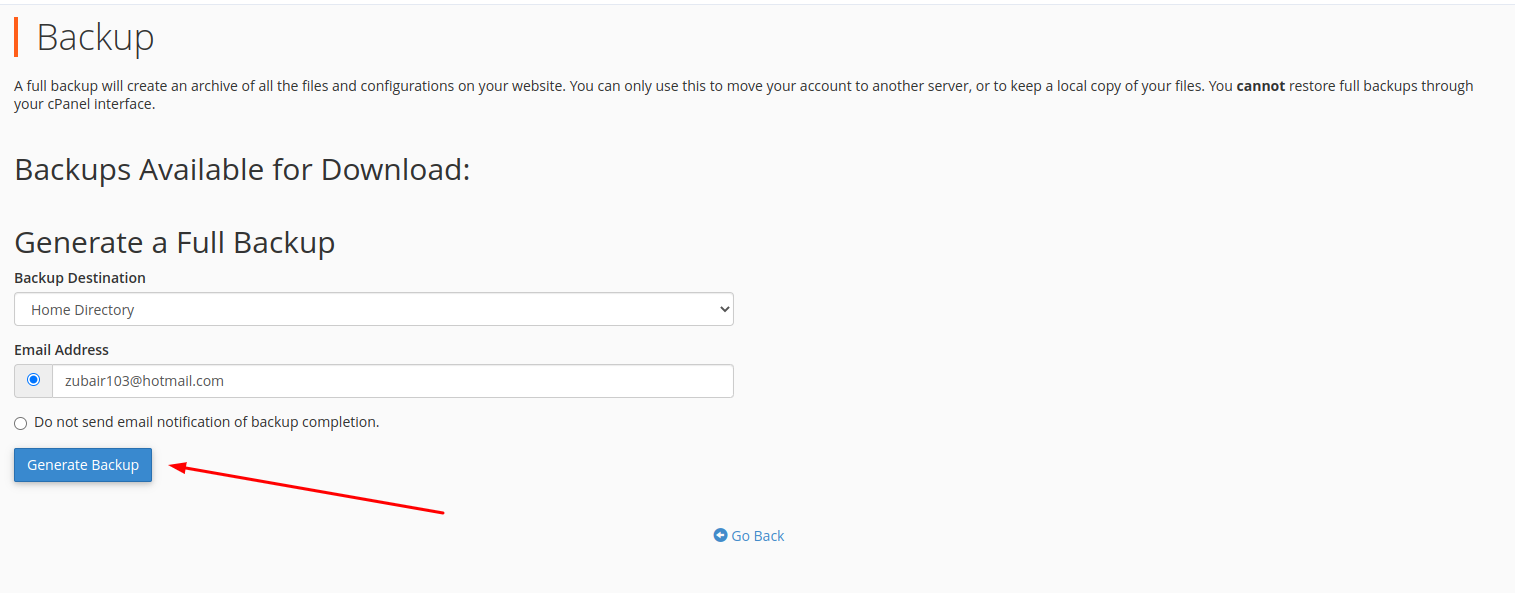
Step 4: Generate the Backup
- Default Save Location: By default, the backup will be saved in your account's home directory.
- Generate Backup: Click on the Generate Backup button to start the backup process.
Step 5: Monitor Backup Status
- Notification Message: You will see a message notifying you that the backup generation process has started.
- Go Back: Click on Go Back to monitor the status of the backup generation process in real-time.
Step 6: Confirm Completion
- Completion Check: A green checkmark next to the backup name will indicate that the backup has been successfully completed.
Conclusion
Once the backup is complete, you can safely proceed with your data modifications or migrations, knowing that you have a full backup of your cPanel account in case you need to restore it later.
