Setting up Google MX Records from your cPanel
MX records are DNS settings that control where your domain's email should be directed. If you’re using Google Workspace for emails, setting up Google’s MX records is essential to ensure your emails are routed correctly. Below is a step-by-step guide to setting up these records in cPanel.
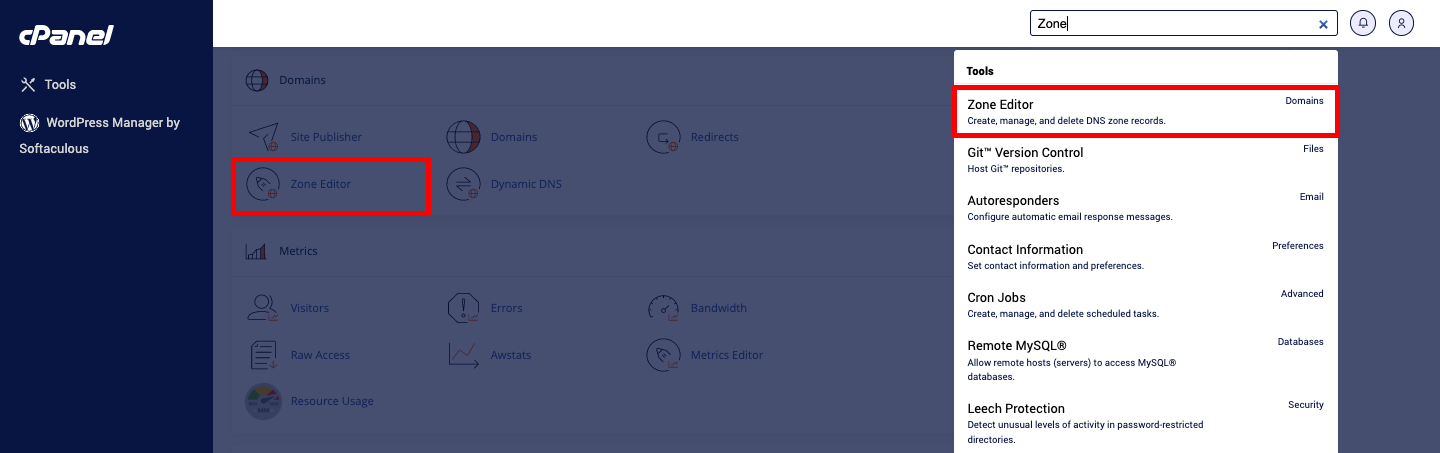
Step 1: Log in to cPanel
Access your cPanel dashboard. Once logged in, type "Zone Editor" in the top right search bar.
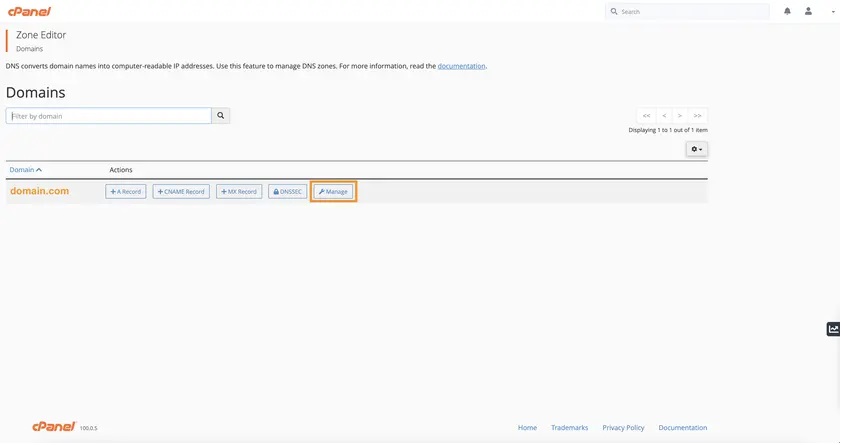
Step 2: Open the Zone Editor
Locate the domain for which you want to set up Google MX records. Then, click on Manage next to the domain name.
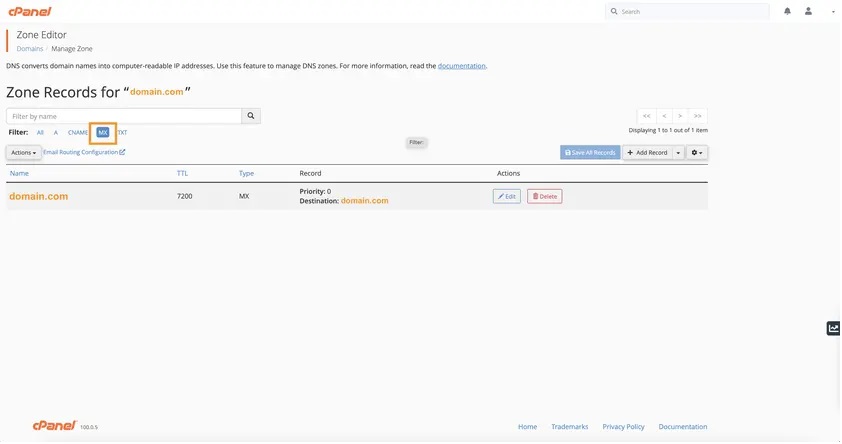
Step 3: Filter by MX Records
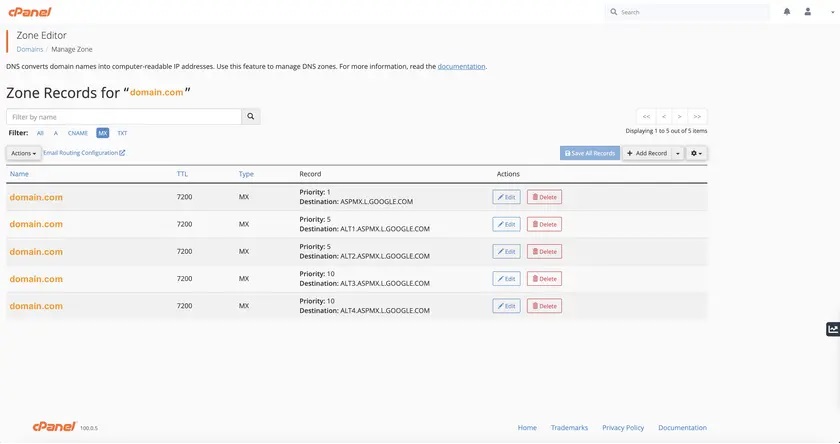
In the Zone Editor, you’ll see a list of all DNS records for your domain. Filter these records by clicking on the MX tab to view and manage only the MX records.
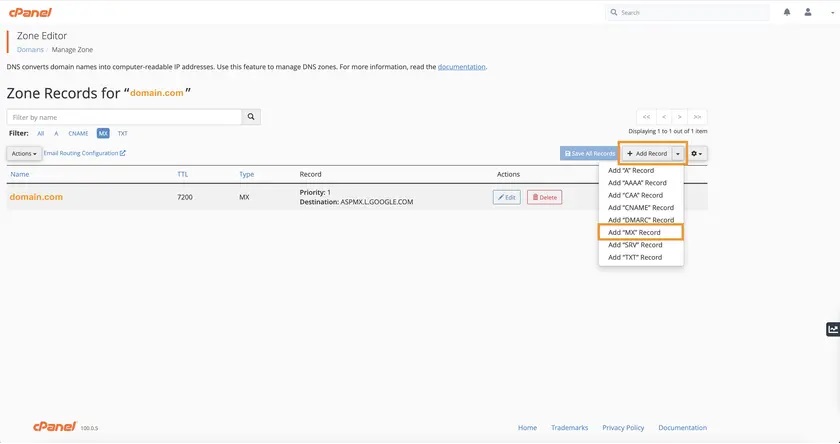
Step 4: Add Google MX Records
Edit the existing MX record or add new ones to match the Google MX records as follows:
- Primary MX Record:
Value: ASPMX.L.GOOGLE.COM
Priority: 1

STEP 5:Additional MX Records:
ALT1.ASPMX.L.GOOGLE.COM(Priority 5)
ALT2.ASPMX.L.GOOGLE.COM(Priority 5)ALT3.ASPMX.L.GOOGLE.COM(Priority 10)ALT4.ASPMX.L.GOOGLE.COM(Priority 10)
- Ensure the "Name" field for each record remains your domain name.
Step 6: Once completed, the MX records list should reflect the above values.
STEP 7: To ensure your emails are routed to an external server :Type "Email Routing" in the cPanel search bar and select the option.

Step 8: In the Email Routing settings, select your domain and set it to Remote Mail Exchanger. Click Change to save this setting .
The updated MX records will typically allow you to start sending and receiving emails from your Google Workspace account within about 6 hours. However, DNS changes can sometimes take up to 48-72 hours to propagate fully.
By following these steps, your domain’s email should be correctly routed to Google Workspace, ensuring reliable delivery and receipt of emails on your custom domain.
