Creating An Email Account on Your cPanel Hosting
One of the great features included in most 4xhost hosting packages is the ability to create unlimited email accounts within your cPanel account. If you’re new to creating a custom email account with your domain name, here’s a straightforward guide:
Step-by-Step Guide to Creating a New Email Account
Log in to cPanel:
Access cPanel through the 4xhost Client Area, or directly via https://yourdomain.com/cpanel (replace yourdomain with your actual domain).
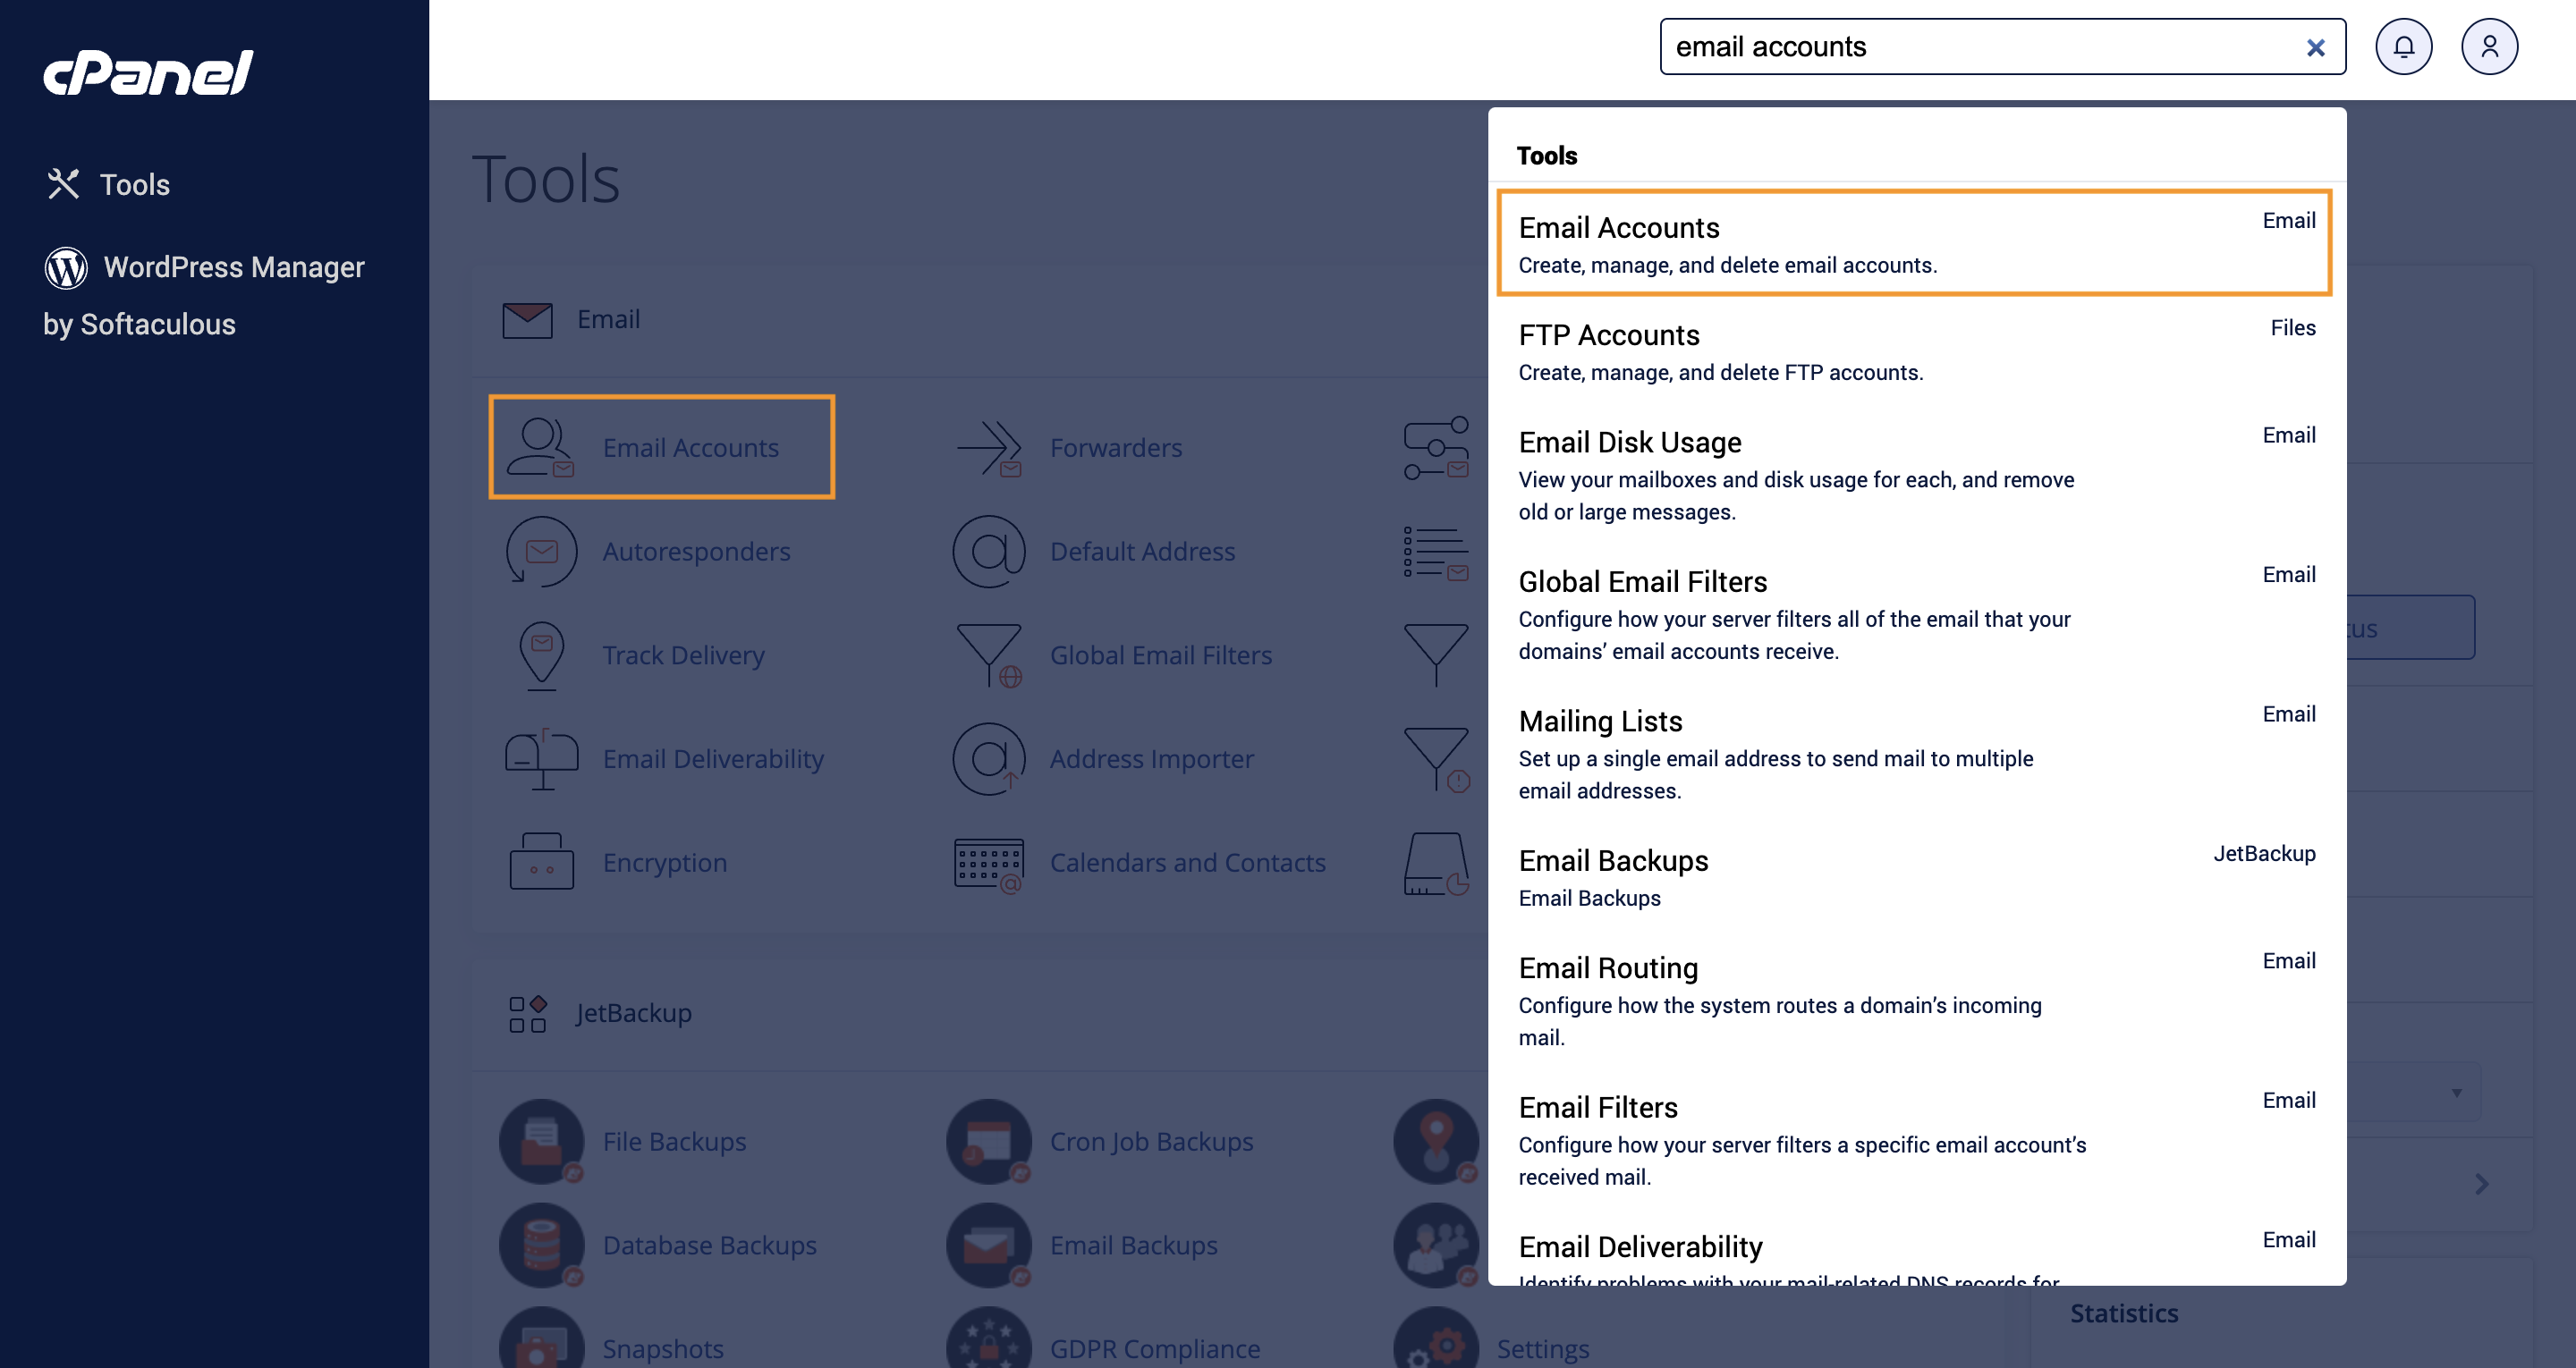
Find the Email Accounts Option:
Once on the cPanel dashboard, either type Email Accounts in the top-right search bar or locate and click on Email Accounts in the Email section.
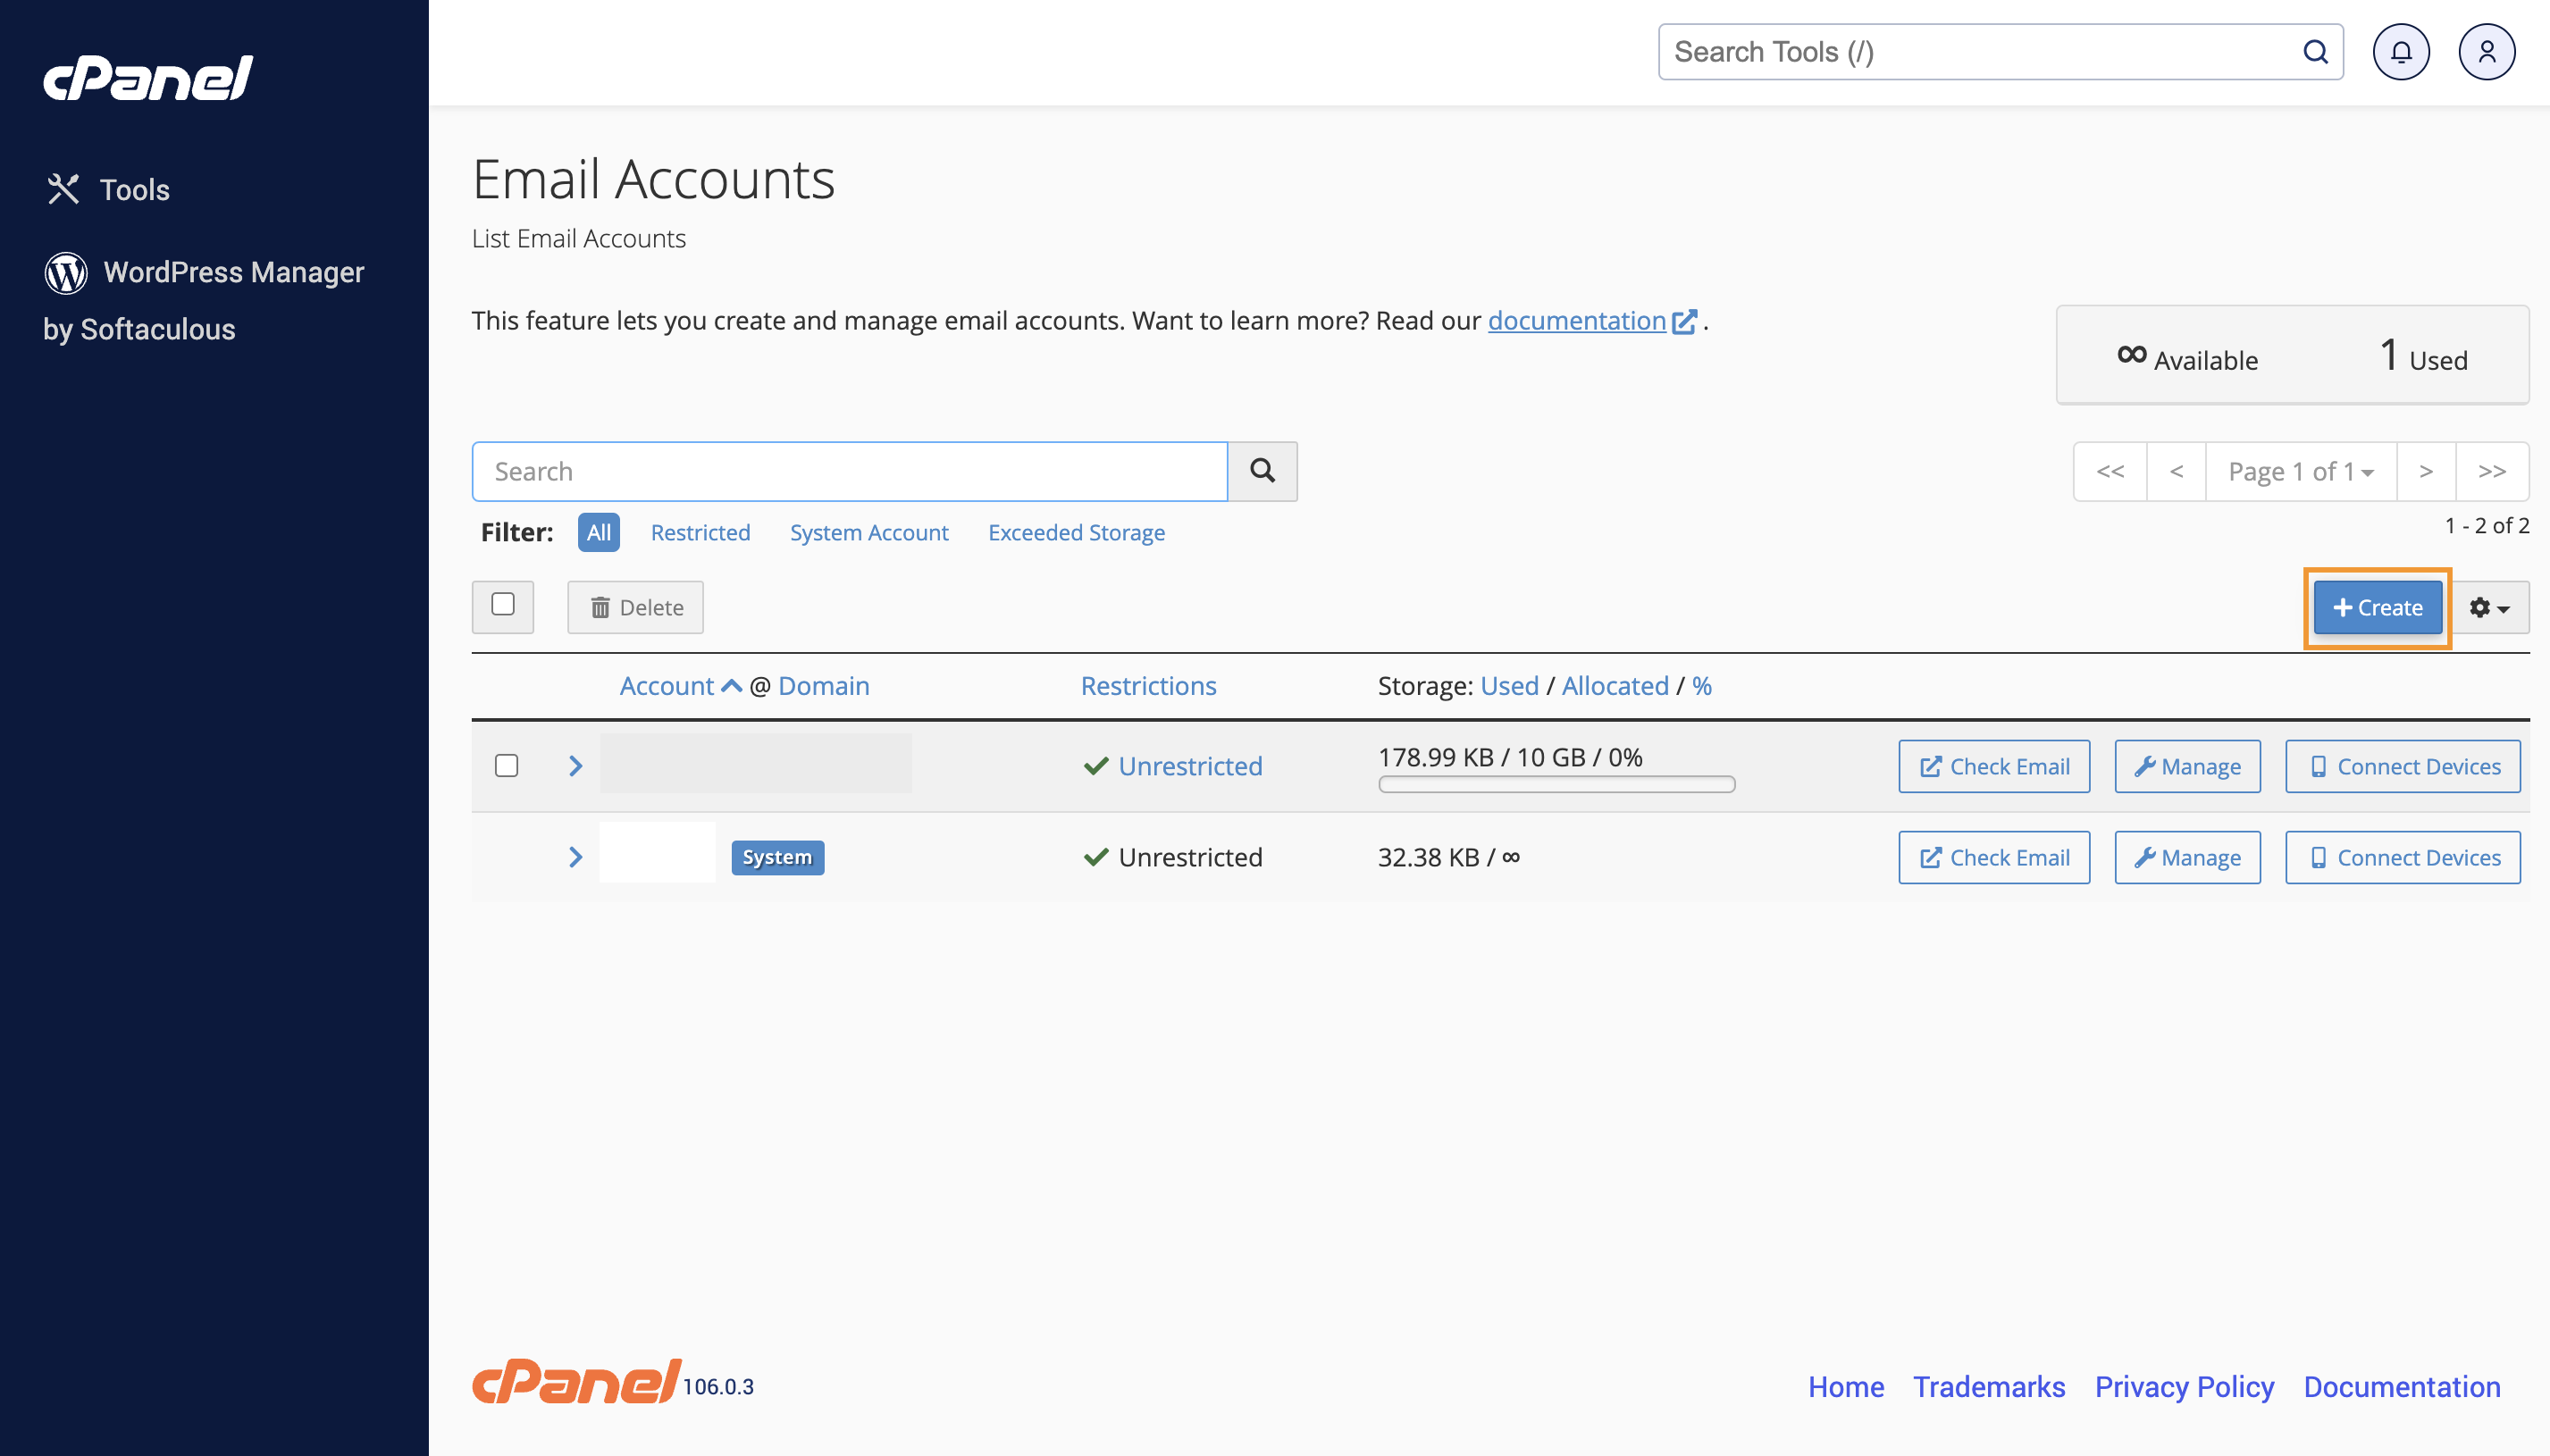
Create the Email Account:
On the next page, click the +Create button.
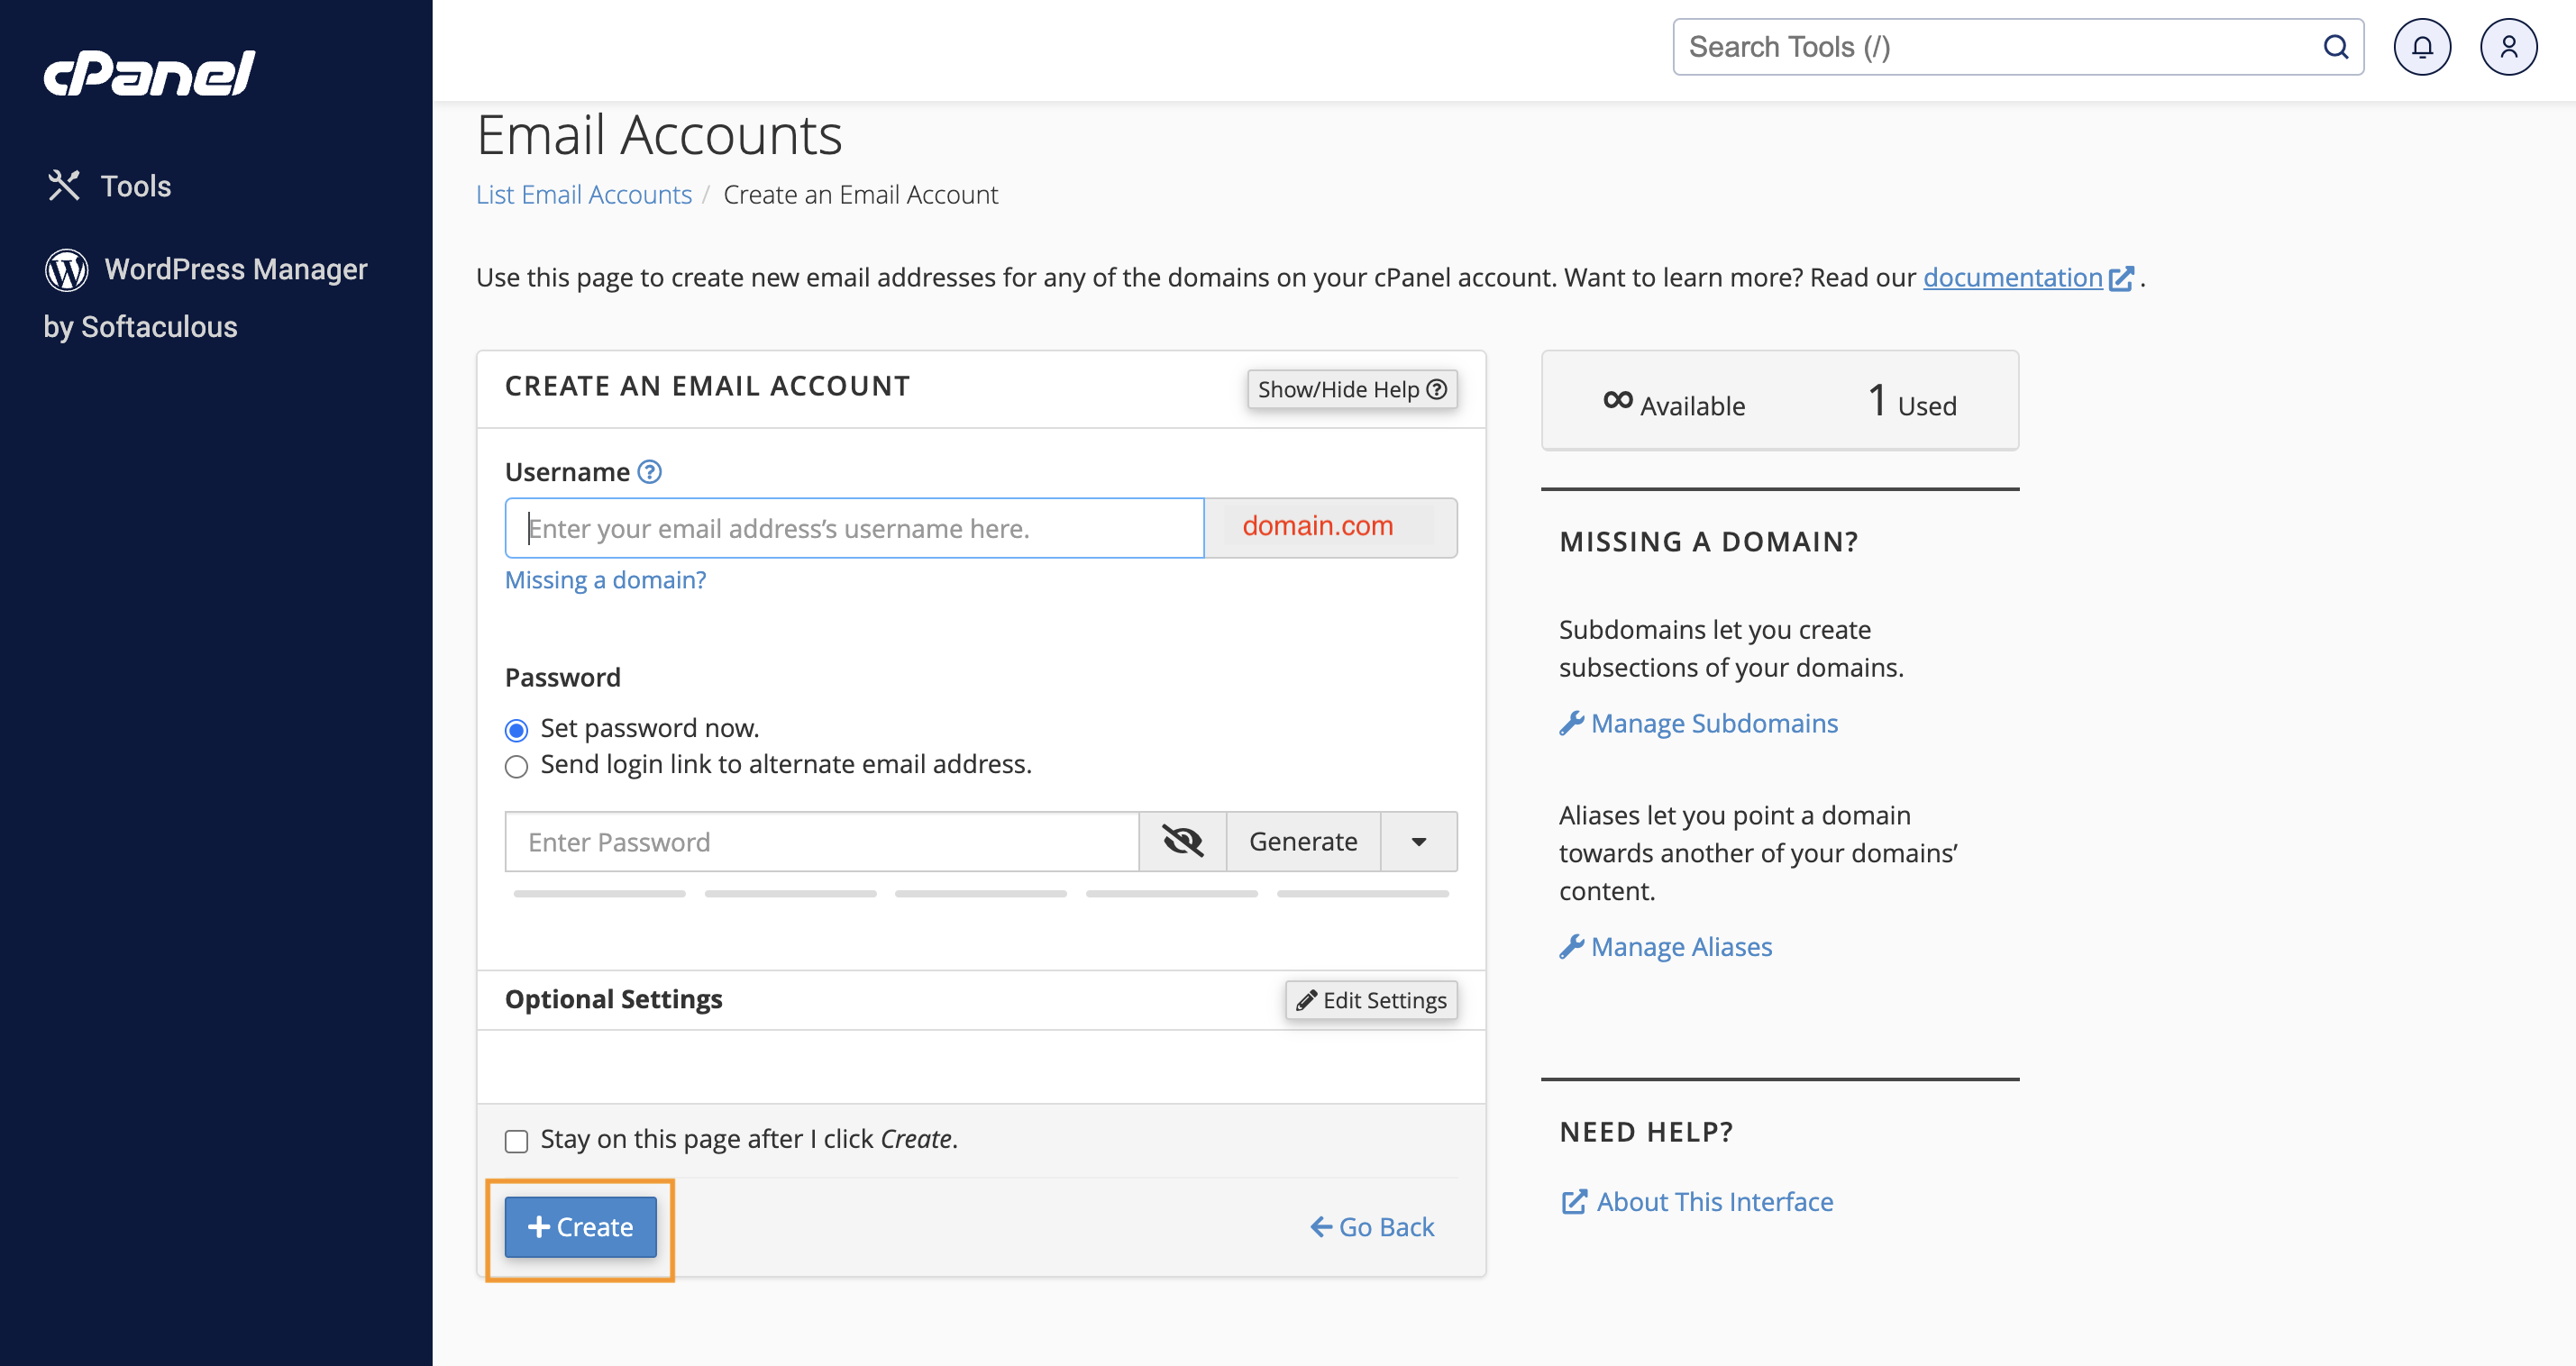
Enter the details for your new email account, including your preferred username and a secure password. It’s recommended to use a strong password, which you can generate from sites like random.org.
Once completed, scroll down and click Create.
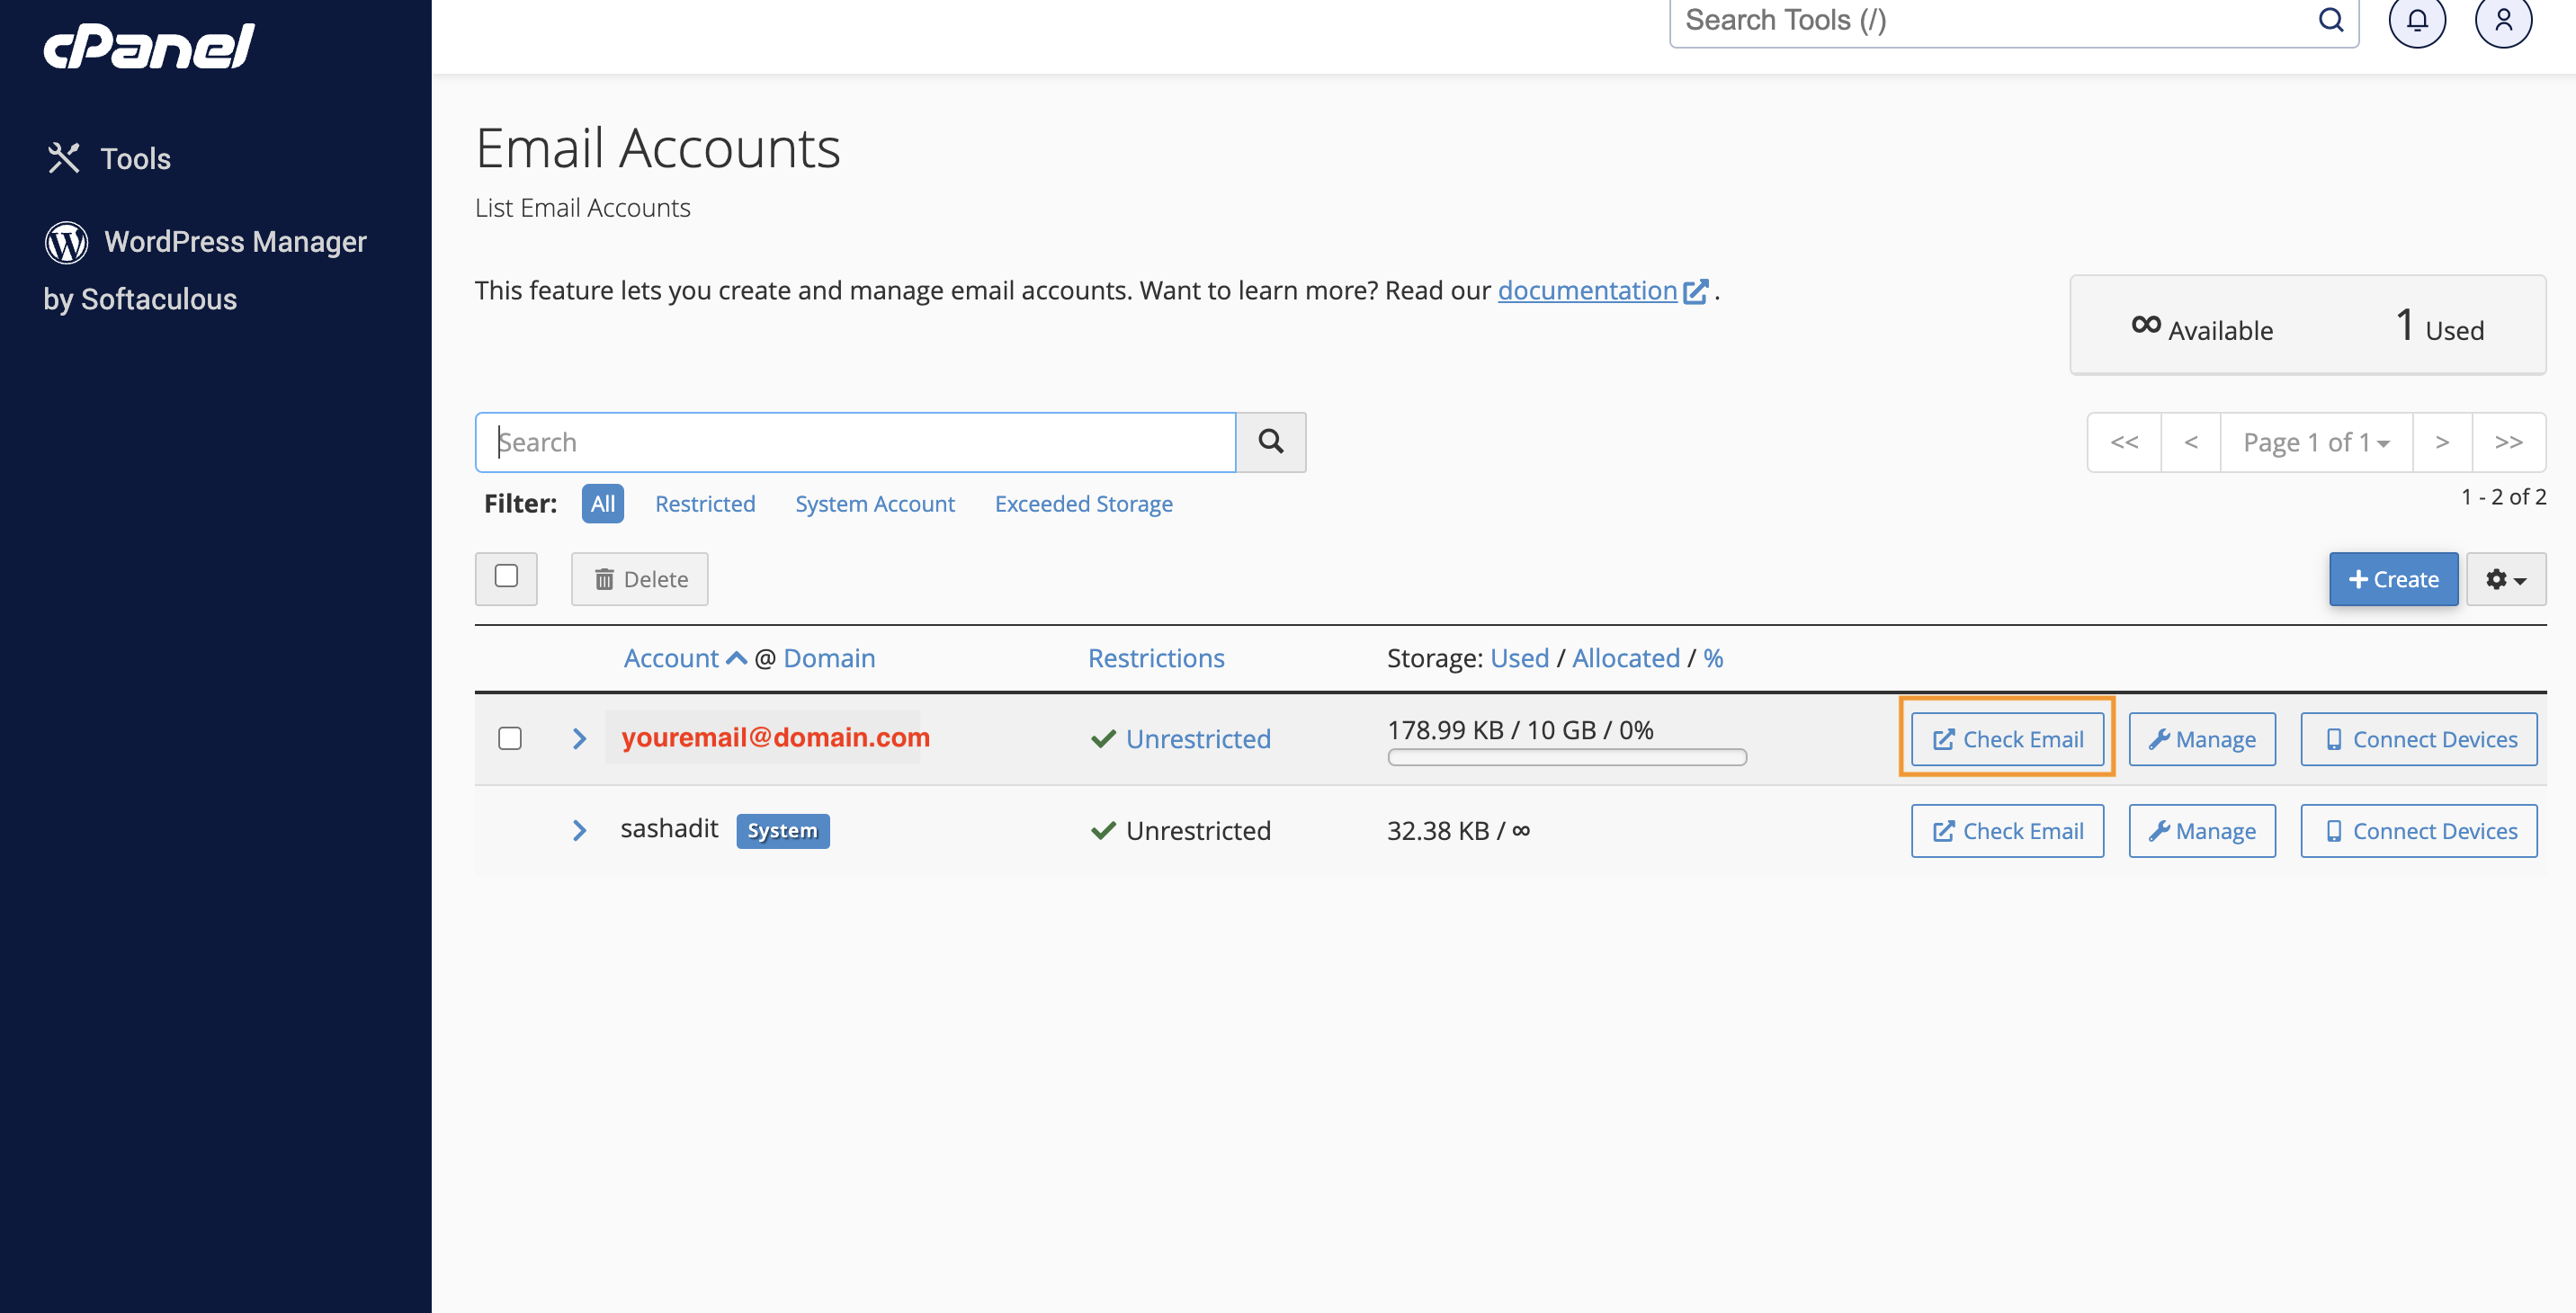
Accessing Your Inbox:
After creating the account, you’ll return to the previous page, where you’ll see your email accounts. Click Check Email next to your new account.
Webmail Interface:
You’ll now be in the Webmail interface. To bypass the welcome screen next time, select Open my inbox when I log in, then click Open. Select Roundcube as your email software.

Using Your Email Account:
You’ll now see the Roundcube interface, where you can view emails and compose new ones. Your first message will contain setup information for the account.
To configure this email on a third-party app (like Outlook, Gmail, or Thunderbird), refer to the “Mail Client Manual Settings” for the required information.

And that’s it! Creating an email account should be simple and hassle-free.
If you encounter any issues, feel free to contact 4xhost’s 24/7 support team—they’ll be happy to assist.
