Outlook 365 Auto Archive Setup
Auto archiving is a tool that helps you manage space in your inbox or on the email server you are using. It automatically moves items to an archived location so your inbox doesn’t get cluttered. It can also permanently delete items that have surpassed their aging periods.
Each Outlook folder has its own default aging period. Unless excluded, any Outlook item older than its aging time is auto-archived. Here are the default aging periods for automatic archiving:
- Inbox: Archived after six months
- Drafts: Archived after six months
- Sent Items: Archived after two months
- Deleted Items: Archived after two months
- Outbox: Archived after three months
- Calendar: Archived after six months
- Tasks: Archived after six months
- Notes: Archived after six months
- Journal: Archived after six months
Below are the steps to set up auto-archiving in Outlook, using Outlook 365 as an example (these steps work for older versions like Outlook 2021, 2019, and 2016 too):
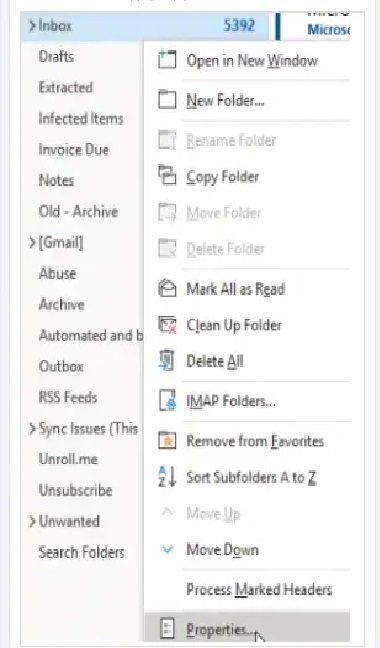
Open Outlook. Right-click on the folder where you want to set up auto-archive. You can even apply it to the inbox folder.
After right-clicking, click Properties at the bottom of the menu.
In the Inbox Properties, select the AutoArchive tab.
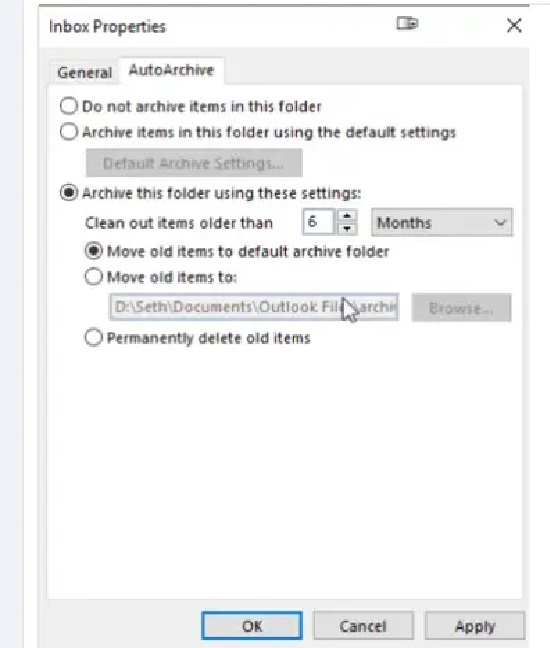
- Choose Settings: Use default settings, or choose not to archive the folder at all.
- Set Aging Period: Under Clean out items older than, set how many months should pass before messages auto-archive.
- Select Action: You can move items to the default archive folder, choose another location, or permanently delete them.
Repeat these steps for each folder you want to set with custom auto-archive options. You can always update these settings or reset them to default anytime.
